aatukal paya recipe

Aattukaal paya recipe how to make restaurant style Aatukaal Paya

Delicious Goat Leg Curry Recipe – A Flavorful and Hearty Dish

Goat leg curry is a rich and aromatic dish that is perfect for special occasions or a hearty weekend meal. With the right blend of spices, tender meat, and fresh herbs, this dish is sure to impress your family and guests. In this blog, we’ll guide you through a simple yet flavorful recipe using fresh ingredients and traditional spices.
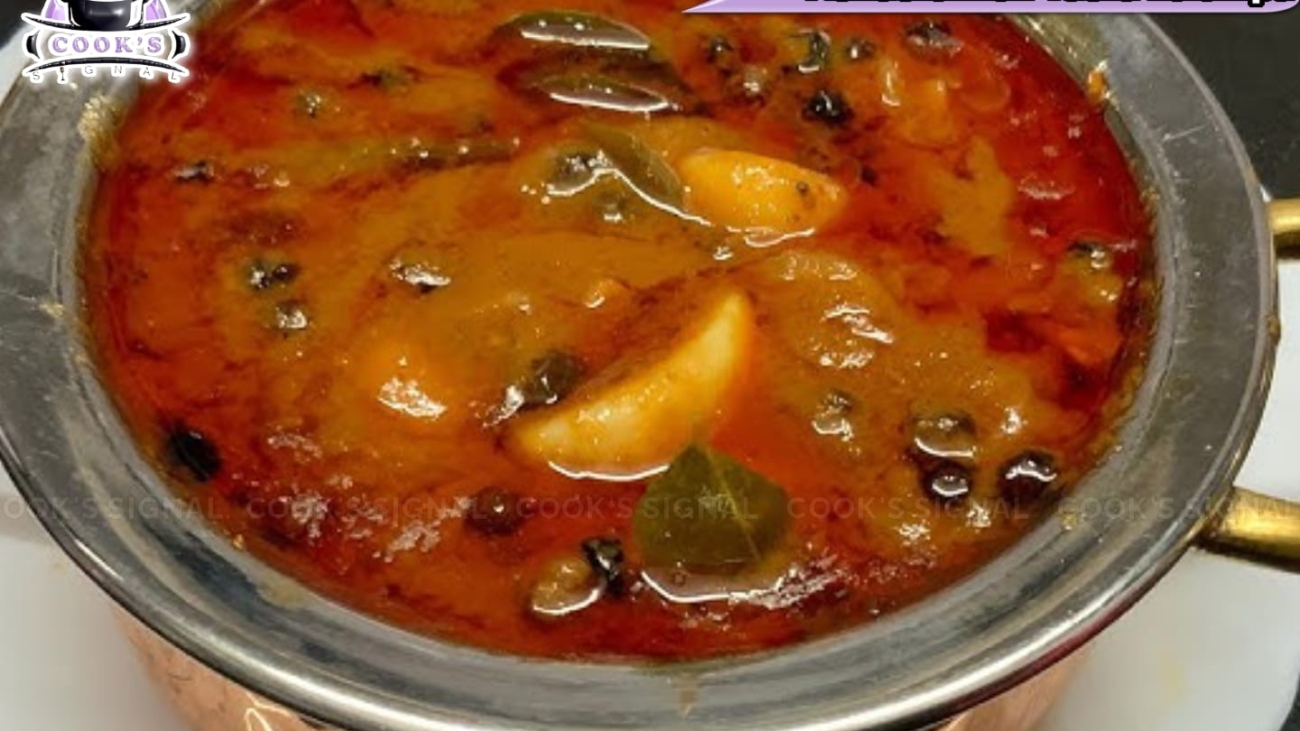
Mutton Paya

Mutton Paya is a delicious curry that pairs wonderfully with parotta, idiyappam, and rice. To prepare it, the mutton legs are first thoroughly cleaned, ground spices are added, sautéed well, and then cooked on a medium flame with water. The flavor is rich, with a thick gravy due to the blended spices. The addition of spices like garlic, pepper, fennel, and cloves makes it flavorful and helps balance body heat. Served hot, it’s a truly authentic delicacy!

Traditional Dish – Mutton Paya holds an important place in South Indian cuisine. It’s a majestic dish enjoyed with parotta, idiyappam, or rice.

Flavor and Aroma – The addition of spices like pepper, garlic, fennel, and cloves gives Paya a unique aroma and intense flavor.

Comforting Food – It’s considered a medicinal food, especially during winter or when one is suffering from fever or weakness.

Balances Body Heat – Ingredients like pepper and garlic in Paya have properties that help balance body heat, providing excellent immune support.

Strengthens Bones – The fat and bone marrow in mutton legs are excellent sources of fat and protein, providing essential calcium and nutrients for bones.

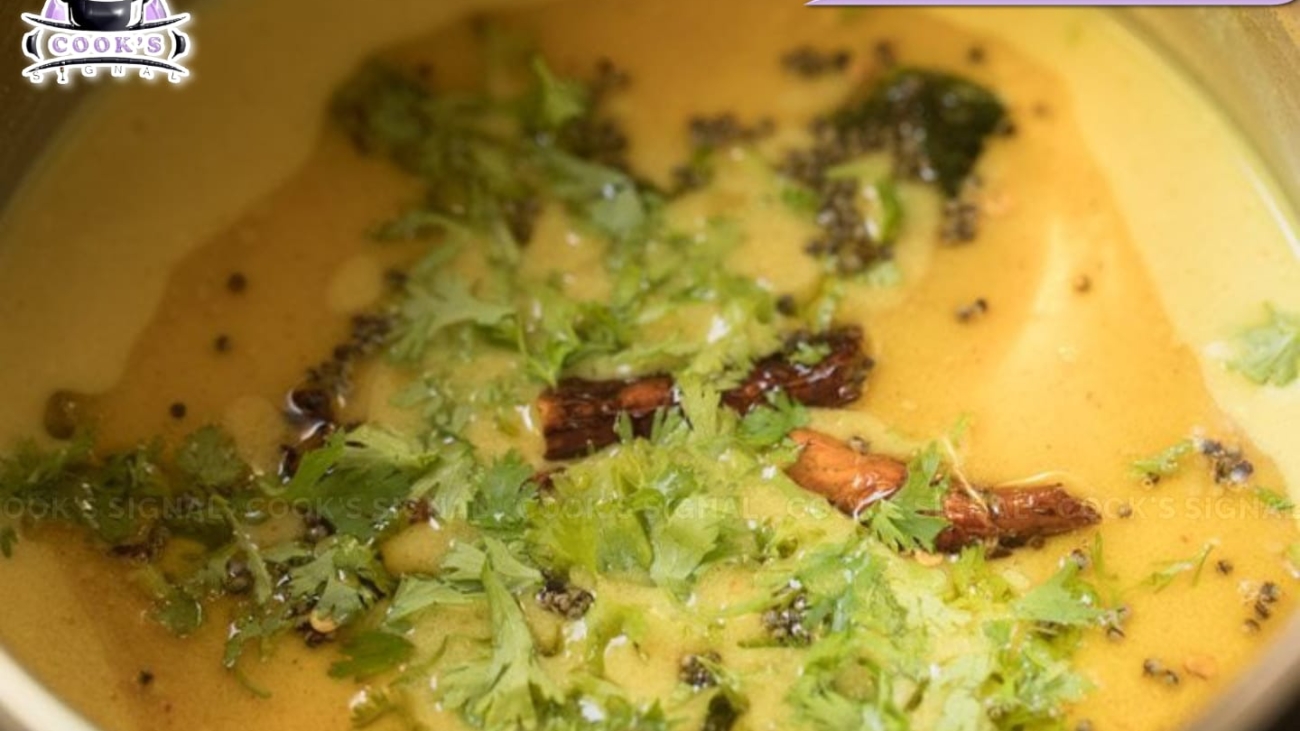
Excellent Soup – The yellowish, slightly thick soup of Mutton Paya is its highlight, offering a smooth, soothing experience when sipped.

Good for the Stomach – Its warmth and spices enhance digestion, reducing intestinal issues and gas problems.

Satisfying Meal – This dish is cooked for an extended period, making it a fulfilling meal when served with parotta.

Best in Winter – Consuming Paya in the morning during winter keeps the body warm and boosts immunity.

Historically Popular in Royal Households – Considered a grand dish since the times of kings and landlords, it was a favorite in many palaces.

Preparation Time

35 Minutes

Serve

4 person

Ingredients:

Required Cooking Equipments

Cooking Instruction :

Serving Method

Cooking Tips

Kothamalli chutney in tamil

கொத்தமல்லி சட்னி செய்முறை அடுத்தமுறை கொத்தமல்லி சட்னி அரைக்கும் போது இப்படி ட்ரை பண்ணி பாருங்க

கொத்தமல்லி சட்னி:

கொத்தமல்லிய பெரும்பாலும் ரசத்துக்கு சாம்பாருக்கு கிள்ளிதா போடுவாங்க

ஆனா கொத்தமல்லில இருக்குற சத்துக்கு அத கிள்ளி போட்டு சமைக்குறது மட்டும் யூஸ் பண்ணாம ஒரு கொத்த அப்டியே சட்னியா சமைச்சு சாப்டா எவளோ நன்மை கிடைக்கும்னு தெரியுமா. நம்ம இப்போ கொத்தமல்லிய வச்சு ஒரு சூப்பர் ஆன கொத்தமல்லி சட்னி செய்ய போறோம்.வீட்டுல வெங்காயம் தக்காளி எதுமே இல்லைனா இந்த ரெசிபிய செஞ்சு பாருங்க 

அட்டகாசமா இருக்கும் இந்த சட்னி இட்லி, தோசை சப்பாத்தி பூரி எல்லாத்துக்குமே செம காம்பினேஷனா இருக்கும்.

நல்லா புளிப்பா காரசாரமா சாப்பிடுவதற்கு அவ்வளவு ருசியா இருக்கும் கொஞ்சம் வித்தியாசமான டேஸ்ட்ல இருக்கும். ஒரு தடவை செஞ்சு பார்த்துட்டீங்கன்னா அதுக்கப்புறம் வீட்ல வெங்காயம் தக்காளி பார்த்துட்டீங்கன்னா இந்த ரெசிபி தான் உங்களுக்கு ஞாபகத்துக்கு வரும். கண்டிப்பா ஒரே ஒரு தடவை செஞ்சு பாருங்க வீட்ல இருக்க கூடிய எல்லாருமே விரும்பி சாப்பிடுவாங்க.

இட்லி தோசைக்கு எப்போ ஒரே மாதிரியான சட்னி, சாம்பார் செய்யாமல் கொஞ்சம் வித்தியாசமா இந்த மாதிரியும் செஞ்சு கொடுத்தா டெய்லி சாப்பிடுற இட்லி தோசையே விரும்பி டெய்லி ஒரு சிலருக்கு இட்லி, தோசை சாப்பிட்டு ரொம்ப போர் அடிச்சு போயிருக்கும் அந்த மாதிரி இருக்கிறவங்களுக்கு தினமும் ஒரு சைட் டிஷ் செஞ்சு கொடுத்தா கண்டிப்பா இட்லி தோசையவே வேண்டாம்னு சொல்லாம சாப்பிடுவாங்க. இந்த சுவையான ரெசிப்பிக்கு கண்டிப்பா எல்லாருமே நாலஞ்சு இட்லி சேர்த்தே சாப்பிடுவாங்க.

இது எப்படி இருக்கும்னு யோசிக்க வேண்டாம் ஒரு தடவ செஞ்சு பாருங்க அதுக்கப்புறம் நீங்களே புடிச்சு போய் அடிக்கடி செய்வீங்க. வீட்டுக்கு யாராவது விருந்தாளிகள் வந்தாலும் செய்வீங்க. நீங்க இதை செஞ்சு கொடுக்கலாம். இந்த சுவையான கொத்தமல்லி சட்னிக்கு ரொம்ப ரொம்ப குறைவான பொருள் மட்டுமே போதுமானது. அவ்ளோ சூப்பரா இருக்கும் நீங்க நினைச்சு பாக்க முடியாத அளவுக்கு ஒரு டேஸ்ட்டில் உங்களுக்கு இந்த ரெசிபி கிடைக்கும். இப்ப வாங்க இந்த சுவையான டேஸ்ட்டான கொத்தமல்லி சட்னி ரெசிபி எப்படி செய்றதுன்னு பாக்கலாம்.


இந்த கொத்தமல்லி சட்னி – எளிமையாவும், அருமையாவும் எப்படி செய்யலாம்னு பாக்கலாம்.

இந்த சட்னி ஏன் சூப்பர்னா?

✔ தேங்காய் & பருப்பு இல்லாமலே செம்ம டேஸ்ட் வரும்!

✔ பச்சை, பசுமை, நறுமணம் எல்லாம் ஒரே கூட்டணி!

✔ இட்லி, தோசை, சப்பாத்தி, தயிர் சாதம் – எதோடயும் செம match!

✔ புதினா சேத்து பண்ணா பிளேவர் இன்னும் லெவல் ஆகும்!

🔥 புதினா சேர்த்து புதினா கொத்தமல்லிசட்னி ட்ரை பண்ணுங்க!

🔥 தக்காளி சேர்த்தா சும்மா கலக்கல் புது சுவை வரும்!

🔥 பூண்டு சேர்த்தா ருசியோ ருசி!

தயாரிப்பு நேரம்

35 நிமிடங்கள்

சேவைகள்

4 -5 நபர்

தேவையான பொருட்கள்:

தேவையான சமையல் உபகரணங்கள்

செய்முறை :

பரிமாறும் முறை:

குறிப்பு:

Kothamalli chutney in tamil

Coriander Chutney – Kothamalli Chutney Recipe Topnotch Taste Try This Way!

Coriander Chutney:

Coriander is usually used in small amounts for garnishing sambar and rasam. But do you know how beneficial it is when you make a full chutney out of it instead of just adding a few leaves while cooking?


Today, we’re going to prepare a delicious coriander chutney that can be made even if you don’t have onions or tomatoes at home. This chutney is absolutely amazing and pairs perfectly with idli, dosa, chapati, and poori. It has a tangy, spicy, and unique taste that makes it a delightful side dish. Once you try it, every time you see onions and tomatoes, this chutney will come to your mind!

If you’re bored of eating the same chutney and sambar every day with idli and dosa, try this variation. Even those who are tired of eating idli and dosa daily will love it when paired with this chutney. Serve this at home, and everyone will enjoy it so much that they’ll ask for extra idlis!


Don’t just imagine the taste—try making it once, and you’ll keep making it again and again. It’s so simple yet flavorful that you’ll even prepare it when guests come over! The best part? You only need a few ingredients to make this incredibly delicious chutney.


Now, let’s see how to make this flavorful coriander chutney in a simple yet tasty way.

What makes this chutney special?

✔ No coconut or lentils, yet full of taste!

✔ Fresh green color with an amazing aroma!

✔ Pairs well with idli, dosa, chapati, and even curd rice!

✔ Add mint for an even richer flavor!


🔥 Try mint-coriander chutney for a next-level taste!

🔥 Add tomatoes for a new variation!

🔥 Garlic makes it extra flavorful!


Now, let’s move on to the recipe!

Preparation Time

35 Minutes

Serve

4 person

Ingredients:

Required Cooking Equipments

Cooking Instruction :

Serving Method

Cooking Tips

briyani kathirikai thokku

Kathirikkai Thokku Recipe – Quick Biriyani Thokku Recipe

Brinjal Thokku – The Ultimate Biryani Side Dish!

If you’ve ever had “mess-style” biryani, you know they always serve a special brinjal thokku on the side. The taste? Absolutely next level! This dish pairs so well with biryani that you’ll end up eating two extra plates without even realizing it! Not just for biryani, it’s also great with plain rice, chapati, or dosa. You’ve got to try this!

Preparation Time

35 Minutes

Serve

4 person

Ingredients:

Required Cooking Equipments

Cooking Instruction :

Serving Method

Cooking Tips

briyani kathirikai thokku

பிரியாணி கத்திரிக்காய் தொக்கு செய்வது எப்படி ஒரு தடவ இப்படி செஞ்சு பாருங்க

பிரியாணி கத்திரிக்காய் தொக்கு :

பாய் வீட்டு பிரியாணிலாம் சாப்டுருக்கீங்களா கூடவே ஒரு கத்திரிக்காய் தொக்கு குடுப்பாங்க பாருங்க டேஸ்ட் அல்டிமேட் ஆ இருக்கும்.

சும்மாவே பிரியாணி 2 பிளேட் உள்ள போகும் இதுல கத்திரிக்கா தொக்கு கூட சேத்து சாப்பிட்டீங்கனா இன்னும் எக்ஸ்ட்ரா 2 பிளேட் உள்ள போகும் டேஸ்ட் அவளோ சூப்பரா இருக்கும் கண்டிப்பா ட்ரை பண்ணிப்பாருங்க.

தயாரிப்பு நேரம்

35 நிமிடங்கள்

சேவைகள்

4 -5 நபர்

தேவையான பொருட்கள்:

தேவையான சமையல் உபகரணங்கள்

செய்முறை :

பரிமாறும் முறை:

குறிப்பு:

manathakkali vaththa kulampu in tamil

மணத்தக்காளி வத்தல் -குழம்பு இந்த மாதிரி ஒரு தடவை ட்ரை பண்ணி பாருங்க மிச்சமே வைக்க மாட்டாங்க 

மணத்தக்காளி வத்தல் குழம்பு

வணக்கம் நண்பர்களே! இன்று, தென்னிந்தியாவின் பாரம்பரிய உணவான மணத்தக்காளி வத்தல் குழம்பின் செய்முறையை உங்களுடன் பகிர்ந்து கொள்ளப் போகிறேன். இது சுவையாக இருப்பது மட்டுமல்லாமல், ஆரோக்கியமானதும் கூட.

மணத்தக்காளி வத்தல் குழம்பின் சிறப்பு:

மணத்தக்காளி வத்தல் குழம்பு ஒரு பாரம்பரிய தென்னிந்திய உணவு. இது புளிப்பு, காரம் மற்றும் இனிப்பு சுவைகளின் கலவையாகும்.

மணத்தக்காளி வத்தலில் மருத்துவ குணங்கள் நிறைந்துள்ளன. இது வயிற்றுப் புண்களை ஆற்றும்.

இந்த குழம்பு சாதம், இட்லி, தோசை போன்றவற்றுடன் சேர்த்து சாப்பிட மிகவும் சுவையாக இருக்கும்.

தயாரிப்பு நேரம்

45 நிமிடங்கள்

சேவைகள்

4-5 நபர்

தேவையான பொருட்கள்:

தேவையான சமையல் உபகரணங்கள்

செய்முறை :

பரிமாறும் முறை:

குறிப்பு:

manathakkali vaththa kulampu in tamil

Manathakkali Vaththal Kulampu Recipe at Home

Manathakkali Vathal Kuzhambu:

Try This Once – You Won’t Have Any Leftovers!

Hello, friends!

Today, I’m excited to share the recipe for a traditional South Indian delicacy – Manathakkali Vathal Kuzhambu. This dish is not just delicious but also packed with health benefits.

What’s Special About Manathakkali Vathal Kuzhambu?

This is a classic South Indian dish that balances tangy, spicy, and slightly sweet flavors.

Manathakkali vathal (dried black nightshade berries) has medicinal properties and is known for soothing stomach ulcers.

This kuzhambu pairs well with rice, idli, dosa, and other South Indian staples.

Health Benefits of Manathakkali Vathal

Helps in treating stomach ulcers.

Aids digestion and improves gut health.

Has anti-inflammatory properties.

Preparation Time

45 Minutes

Serve

4-5 person

Ingredients:

Required Cooking Equipments

Cooking Instruction :

Serving Method

Cooking Tips

thengkai paal rasam recipe

Pollachi Special Coconut Milk Rasam: A Delightful Blend of Flavor and Health

Pollachi Special Coconut Milk Rasam: A Delightful Blend of Flavor and Health

Pollachi’s culinary heritage boasts a unique treasure: Coconut Milk Rasam. This isn’t just any rasam; it’s a soothing and flavorful dish packed with health benefits.

Excellent for digestion.

Soothes stomach ulcers.

Beneficial for those with acidity.

Uniquely flavorful.

Preparation Time

30 Minutes

Serve

4 person

Ingredients:

Required Cooking Equipments

Cooking Instruction :

Serving Method

Cooking Tips

thengkai paal rasam recipe

பொள்ளாச்சி ஸ்பெஷல் தேங்காய் பால் ரசம்: சுவையும் ஆரோக்கியமும் ஒரு சேர!

பொள்ளாச்சி ஸ்பெஷல் தேங்காய் பால் ரசம்: சுவையும் ஆரோக்கியமும் ஒரு சேர!

பொள்ளாச்சியின் தனித்துவமான சமையல் பாரம்பரியத்தில் தேங்காய் பால் ரசத்திற்கு ஒரு முக்கிய இடம் இருக்கு. இது வெறும் ரசம் மட்டுமில்ல, ஆரோக்கியம் தரும் அருமருந்தும் கூட.

எப்படி செய்யலாம்னு பாக்கலாம். இந்த தேங்காய் பால் ரசம் டைஜஷனுக்கு மட்டும் இல்லாம வயித்து புண்ணையும் ஆத்தும் அல்சர் இருக்குறவங்க சாப்டா நிறையா பெனிபிட்ஸ் இருக்கு.

இந்த ரசம் செரிமானத்திற்கு மிகவும் நல்லது.

வயிற்றுப் புண்ணயும் ஆத்தும்.

அல்சர் உள்ளவர்களுக்கு மிகவும் பயனுள்ள உணவாகும்.

மிகவும் சுவையாக இருக்கும்.

இந்த எளிய மற்றும் சுவையான பொள்ளாச்சி தேங்காய் பால் ரசத்தை நீங்களும் உங்கள் வீட்டில் செய்து மகிழுங்கள்!

தயாரிப்பு நேரம்

30 நிமிடங்கள்

சேவைகள்

4 நபர்

தேவையான பொருட்கள்:

தேவையான சமையல் உபகரணங்கள்

செய்முறை :

பரிமாறும் முறை:

குறிப்பு:

lal chicken recipe

Lal Chicken ❤️to impress your crush! Easy Spicy LAL CHICKEN RECIPE��

Laal Chicken

If bachelors want to make something easy and tasty, they can try this Laal Chicken. This chicken recipe is a very famous dish in North India. The specialty of this chicken is its spiciness.If you love eating spicy food, you can make and enjoy this fiery Laal Chicken at home. The Kashmiri chili powder used in this dish gives it a vibrant color and an amazing taste that catches the eye. Just looking at this dish will make you crave it instantly.Before eating any food, its color and aroma tempt us—and this dish has both in the perfect amount. Whether you make it for your family or friends, they will be amazed by the taste. You can enjoy this with idli, dosa, chapati, or rice—it will be absolutely delicious!

Now, let’s see how to make it!

Preparation Time

45 Minutes

Serve

4 person

Ingredients:

Required Cooking Equipments

Cooking Instruction :

Serving Method

Cooking Tips